

Appearance
Roles & Permissions
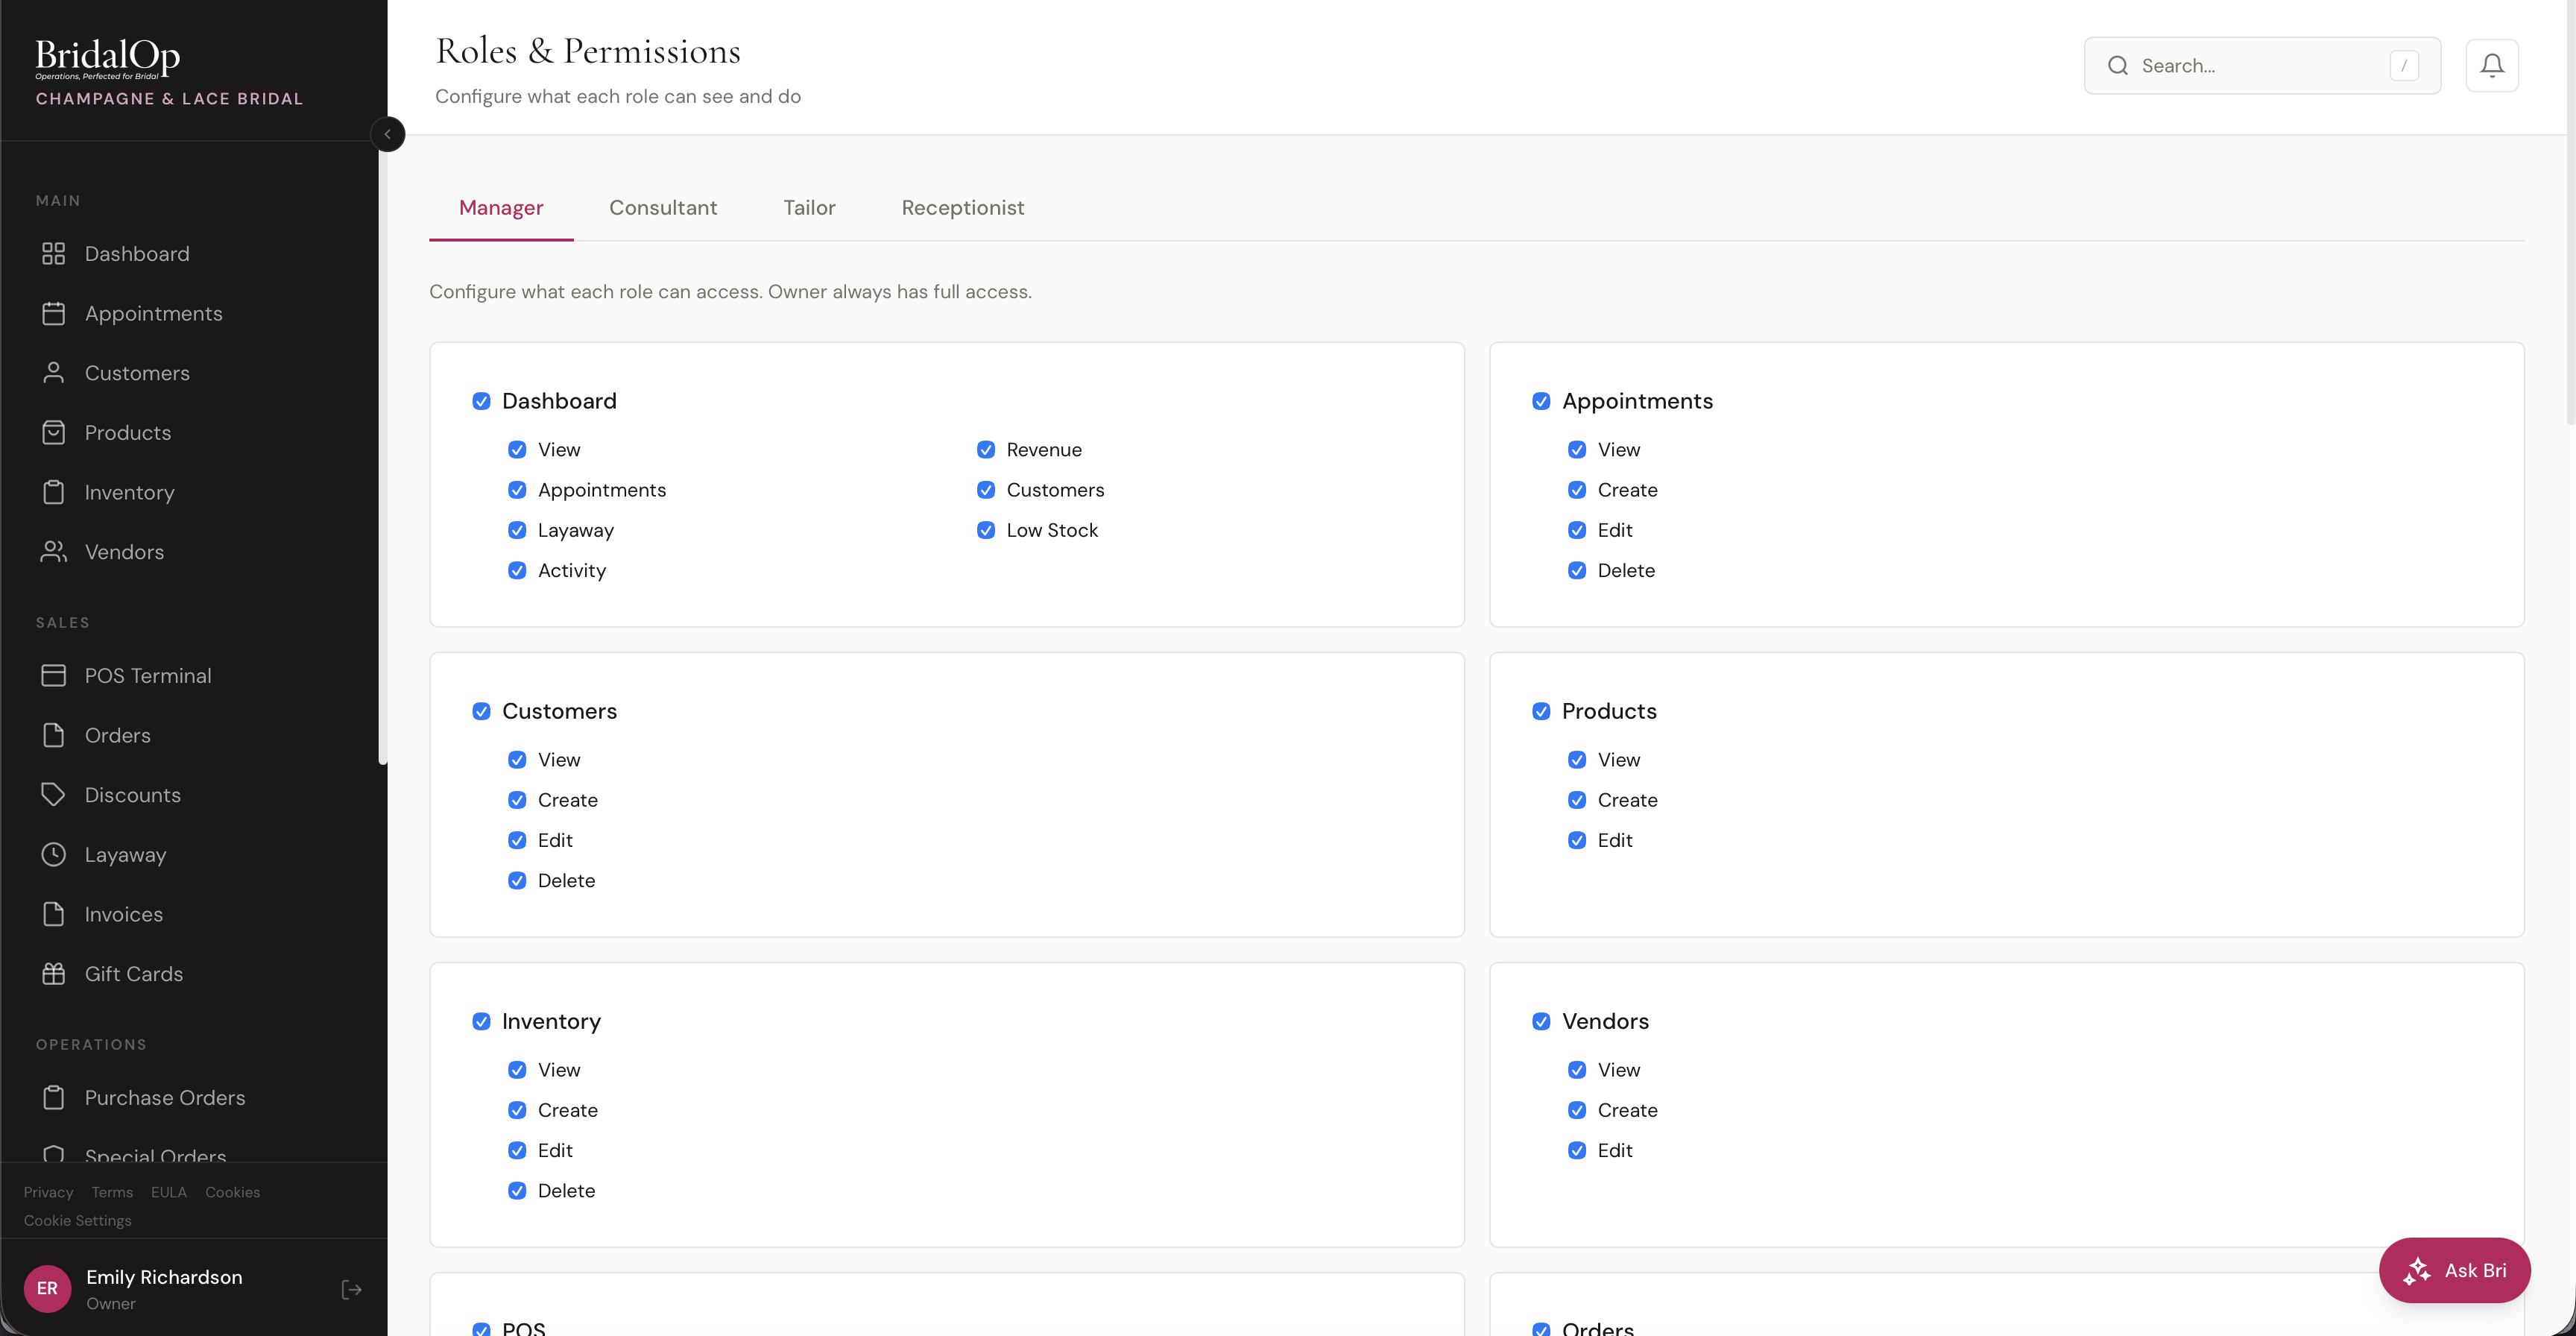
Control exactly what each staff role can see and do in BridalOp. Every feature area has granular checkboxes for View, Create, Edit, and Delete permissions — so you can build roles that match how your team actually works.
Go to Settings > Roles & Permissions to configure them.
Built-In Roles
BridalOp comes with four configurable roles plus the Owner and Accountant roles:
| Role | Description |
|---|---|
| Owner | Full access to everything — cannot be restricted or modified |
| Manager | Full administrative access by default — can be customized |
| Accountant | Read-only financial visibility for bookkeeping — see below |
| Consultant | Sales floor staff — appointments, customers, POS, orders |
| Tailor | Alterations staff — customers, alterations, time clock |
| Receptionist | Front desk staff — appointments, customers, POS |
Each configurable role's default permissions can be adjusted to match your store's workflow. The Owner role always has full access and cannot be modified.
Accountant
The Accountant role is built for bookkeepers and accountants who need to review the numbers without changing anything. It grants read-only access:
- Reports — every report (sales summary, item sales, category sales, team sales, payment methods, discounts, sales tax, layaway, inventory, consignment, appointments, staff hours, SMS, customers, and commissions).
- Dashboard — with the Revenue and Activity widgets.
- View-only access to orders, invoices, layaway, consignment, gift cards, discounts, and purchase orders.
- View-only access to customers, products, inventory, and vendors.
- Time clock (view) and Ask Bri.
The Accountant role has no create, edit, or delete permissions and no access to settings — it can't modify any records. Because it's a financial-visibility role, the Accountant tab is owner-managed only: only an owner assigns it, and its permissions aren't edited through the role tabs like the configurable roles.
Configuring Permissions
Click a role tab (Manager, Consultant, Tailor, or Receptionist) to configure its permissions. The page shows a card for each feature area with checkboxes for the actions available in that area.
Permission Types
Most feature areas have four permission types:
| Permission | What It Allows |
|---|---|
| View | See the feature in the sidebar and view its data |
| Create | Create new records (new customers, new orders, etc.) |
| Edit | Modify existing records |
| Delete | Delete or void records |
Some features have additional permissions specific to that area (e.g., Dashboard has View, Appointments, Layaway, Activity, Revenue, Customers, Low Stock for controlling which widgets are visible).
Feature Areas
Permissions can be set for each of these areas:
- Dashboard — which dashboard widgets the role can see
- Appointments — calendar, booking, and scheduling
- Customers — customer directory and profiles
- Customer Files — gates the Internal Documents category on customer Files tabs (
customer-files.internal). Owner + Manager get this by default; grant to any other role that needs to upload or view staff-only customer files (vendor POs, designer invoices, etc.). Without it, the Internal Documents category is hidden from upload and filter dropdowns and direct URL access returns 403. See Customers → Internal Documents. - Products — product catalog
- Inventory — stock tracking and inventory items
- Vendors — vendor management
- POS — point of sale terminal
- Orders — order management and refunds
- Discounts — discount creation and management
- Layaway — layaway plans
- Invoices — invoice creation and management
- Gift Cards — gift card creation and redemption
- Consignment — consignment settlements
- Purchase Orders — vendor purchase orders
- Special Orders — special order management
- Alterations — alteration jobs
- Contracts — contract creation and signing
- Bulk SMS — bulk text messaging
- Reports — business analytics
- Ask Bri — AI assistant access
- Staff — staff management
- Time Clock — time clock and timesheets
- Settings — access to settings pages
Saving Changes
Permission changes save automatically as you check or uncheck boxes. Staff members with that role will see the updated permissions the next time they navigate or refresh the page.
Assigning Roles to Staff
Roles are assigned when you invite new staff members or edit existing ones. See Staff for details on inviting team members and managing their roles.
TIP
A good rule of thumb: start with the most restrictive permissions and add access as needed. It's easier to grant additional access when someone asks than to realize too late that a role had access to something sensitive.
Prom Module
When the Prom module is on, its screens sit behind permissions you already grant:
| Screen | Permission |
|---|---|
| Schools, Prom Registry | Customers — a school is how a prom customer is grouped, so anyone who can see customers can see these. |
| Prom Settings | General settings. Enforcement decides whether the boutique's promise is kept, so it isn't left to whoever finds a clash inconvenient. |
| Overriding a clash at the till | Set separately in Prom Settings — owner and manager by default — and only applies when enforcement is set to Block. |
The public checker requires no sign-in and never returns a customer's name.