Appearance
Vendors
Manage your suppliers and consignment partners from the Vendors section. BridalOp supports two vendor types — Standard vendors (your regular wholesale suppliers) and Consignment vendors (partners whose items you sell on their behalf with a revenue split).
Vendor List
The main Vendors page shows all vendors with search and a type badge.
| Column | Description |
|---|---|
| Name | Vendor name (click to view details) |
| Contact | Primary contact person |
| Vendor email | |
| Phone | Vendor phone number |
| Type | Standard or Consignment badge |
Adding a Vendor
Click New Vendor to create one.
Standard Fields (All Vendors)
| Field | Required | Description |
|---|---|---|
| Name | Yes | Vendor/company name |
| Contact Name | No | Primary contact person |
| No | Vendor email address | |
| Phone | No | Phone number |
| Website | No | Vendor website URL |
| Portal URL | No | URL of the vendor's account portal where you log in to place purchase orders, check inventory, or manage account settings. Paste either a full URL (https://portal.example.com) or a bare domain (portal.example.com) — BridalOp auto-prepends https://. Surfaced as a one-click Open Portal button across the app — see Vendor Portal Link below. |
| Account Number | No | Your account number with this vendor |
| Payment Terms | No | Default payment terms for Purchase Orders with this vendor (see below) |
| Deposit % | Conditional | Only shown when Payment Terms is "Deposit" — the percentage required upfront |
| Notes | No | Internal notes about this vendor |
Payment Terms Options
The Payment Terms dropdown offers these options:
| Option | Payment Timing |
|---|---|
| Full Payment | Payment is due on the order date |
| Deposit | Deposit percentage required upfront, balance due when the item arrives |
| Net 30 | Payment due 30 days after the item arrives |
| Net 45 | Payment due 45 days after the item arrives |
| Net 60 | Payment due 60 days after the item arrives |
| Net 90 | Payment due 90 days after the item arrives |
When you select Deposit, an additional Deposit % field appears where you enter the percentage required upfront (e.g., 50 for 50%).
How This Ties Into Purchase Orders
The vendor's default Payment Terms automatically apply to every line item on new Purchase Orders with that vendor. When you create a Purchase Order:
- Each line starts with the vendor's default terms
- You can override the terms per line if needed
- The line's Est. Arrival date plus the terms determines when payment is due to the vendor
- You track vendor payments by entering amounts in the Paid field on each line — the Balance updates automatically
This means you can set up each vendor's standard payment schedule once and have it carry through to every PO without re-entering it.
Consignment Vendor
Check "This is a consignment vendor" to enable consignment-specific fields:
| Field | Description |
|---|---|
| Consignment Split % | Percentage paid to the vendor on each sale. Leave blank to use the global default set in Settings > General > Consignment. |
| Payout Method | How you pay this vendor — Digital Check, Venmo, Zelle, Cash App, or PayPal |
| Payout Username | The vendor's payment handle (e.g., @username for Venmo, email for PayPal). Only shown for non-check methods. |
Vendor Profile
Click any vendor in the list to view their profile.
Standard Vendor

At the top of the vendor profile, stat cards give you a quick overview of this vendor's performance:
| Stat | What It Shows |
|---|---|
| Quality Score | Percentage of received items without QC issues (e.g., "80% — 1 issue / 5 received"). Color-coded: green for high, amber for moderate, red for low. |
| Total POs | Number of purchase orders placed with this vendor, with count of received items |
| In Stock | Total inventory items currently in stock from this vendor, with retail value |
| 2026 Sales | Year-to-date revenue from this vendor's products, with units sold |
| Top Sellers | Best-selling products from this vendor with price and units sold |
| QC Issues by Type | Breakdown of quality control issues (Damaged, Wrong Item, etc.) with counts and percentages |
Below the stats, the profile has three tabs and a contact info sidebar.
Products tab — all products from this vendor, showing name, SKU, style number, price, in-stock count, and status.
Purchase Orders tab — all POs placed with this vendor, showing PO number, date, item count, total, and status (Draft, Submitted, Shipped, Partially Received, Received, Cancelled).
Add-ons tab — manage product add-ons offered by this vendor (see Add-ons below).
Color Groups tab — manage named color palettes (see Color Groups below).
Size Charts tab — manage named size charts with measurements (see Size Charts below).
Contact Info sidebar — email (clickable), phone, website (opens in new tab), Portal URL (opens in new tab — see Vendor Portal Link), account number, and payment terms.
Consignment Vendor
Consignment vendors have everything above plus:
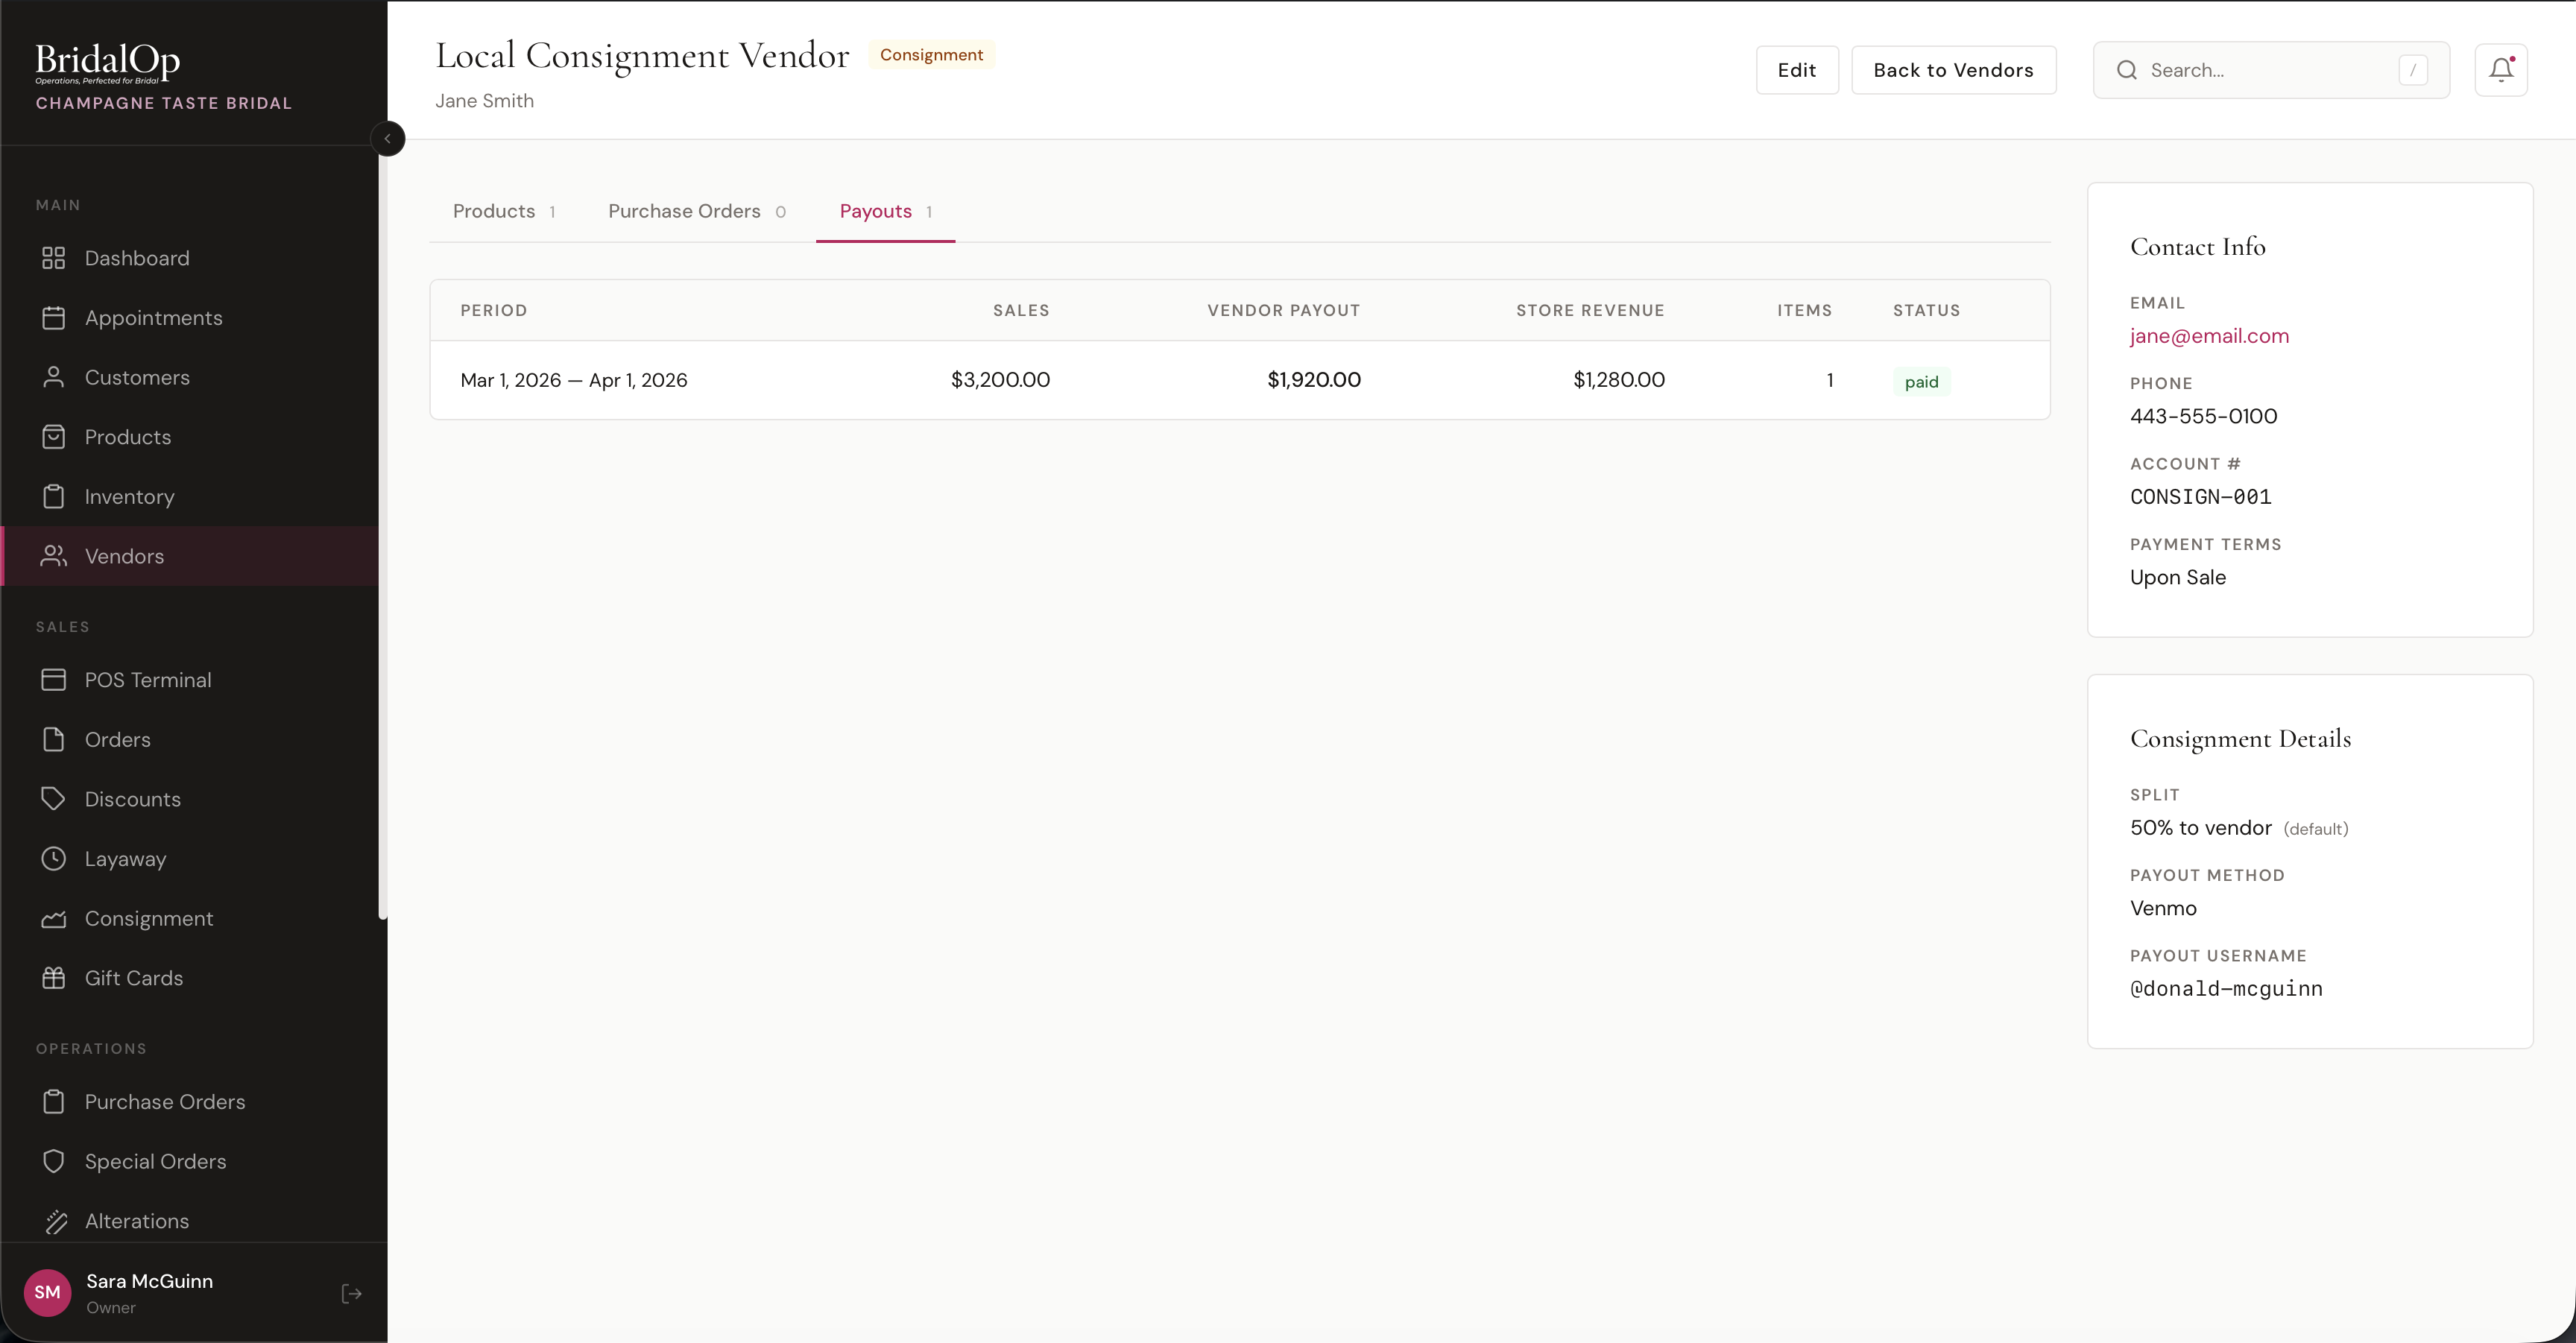
Payouts tab — a table of all consignment settlement periods showing:
| Column | Description |
|---|---|
| Period | Date range for the settlement (e.g., "Mar 1, 2026 — Apr 1, 2026") |
| Sales | Total sales amount from their consignment items |
| Vendor Payout | The vendor's share based on the split percentage |
| Store Revenue | Your boutique's share |
| Items | Number of consignment items sold |
| Status | Draft, Finalized, or Paid |
Consignment Details sidebar — shows the split percentage (with "(default)" label if using the global setting), payout method, and payout username.
Vendor Portal Link
The Portal URL field on a vendor (set on the create / edit form) gets surfaced anywhere staff are likely to need fast access to the vendor's own account portal — usually for placing POs, checking stock, or managing account settings.
Once a Portal URL is set, BridalOp shows it in four places:
| Where | What You See |
|---|---|
| Vendor profile header | Prominent Open Portal button at the top of the vendor show page — one click opens the portal in a new tab |
| Vendor contact card | A clickable Portal URL line in the contact sidebar |
| Vendor list table | A small external-link icon next to the vendor row — same click-to-open behavior |
| Purchase Order detail | An Open Portal ↗ link directly under the vendor name on the PO show page — most useful spot, since staff often jump from a draft PO straight into the vendor's portal to actually submit it |
If the vendor has no Portal URL set, all four surface points are hidden — they only render when the field is populated.
Vendor Add-ons
Add-ons are optional extras that a vendor offers on their products — things like extra beading, a matching belt, rush processing, or a length change. Each add-on has an additional price (what you charge the customer) and an additional cost (what the vendor charges you).
Click the Add-ons tab on any vendor's profile to manage their add-ons.
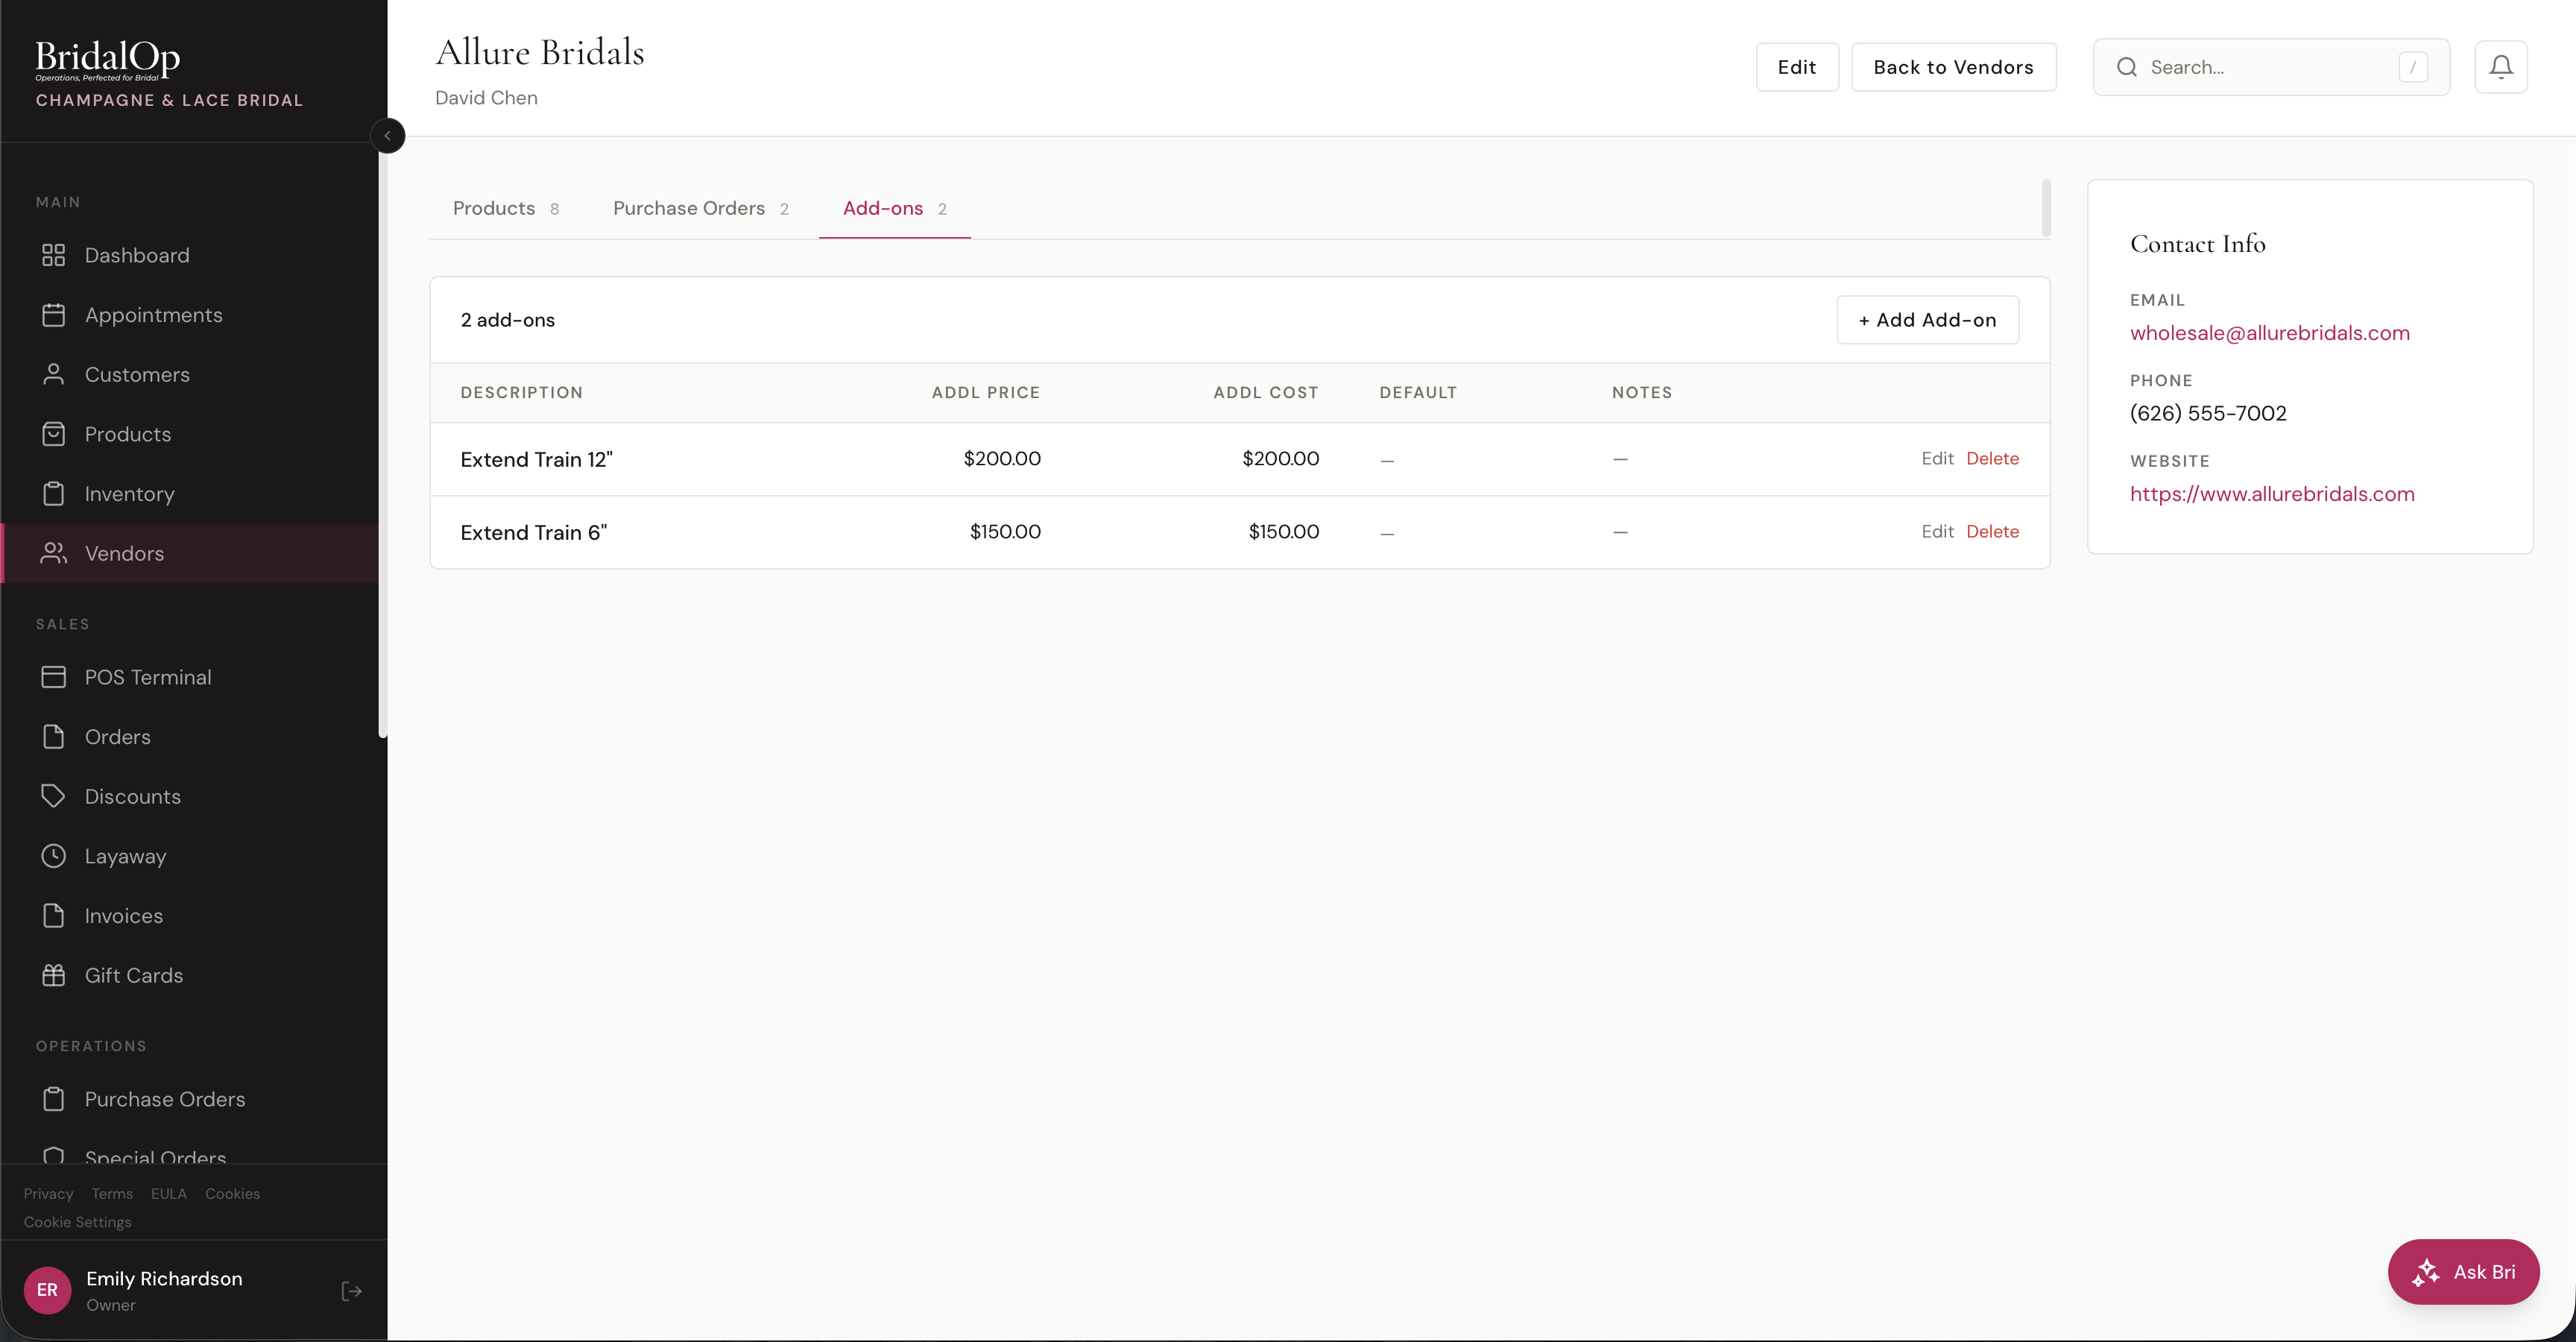
Add-ons Table
| Column | Description |
|---|---|
| Description | What the add-on is (e.g., "Extra Beading", "Rush Fee") |
| Addl Price | Additional price charged to the customer |
| Addl Cost | Additional cost to you from the vendor |
| Default | Badge shown if this add-on is auto-applied to products (see below) |
| Notes | Optional internal notes |
Creating an Add-on
Click + Add Add-on in the tab header. Fill in the description, additional price, additional cost, and optional notes.
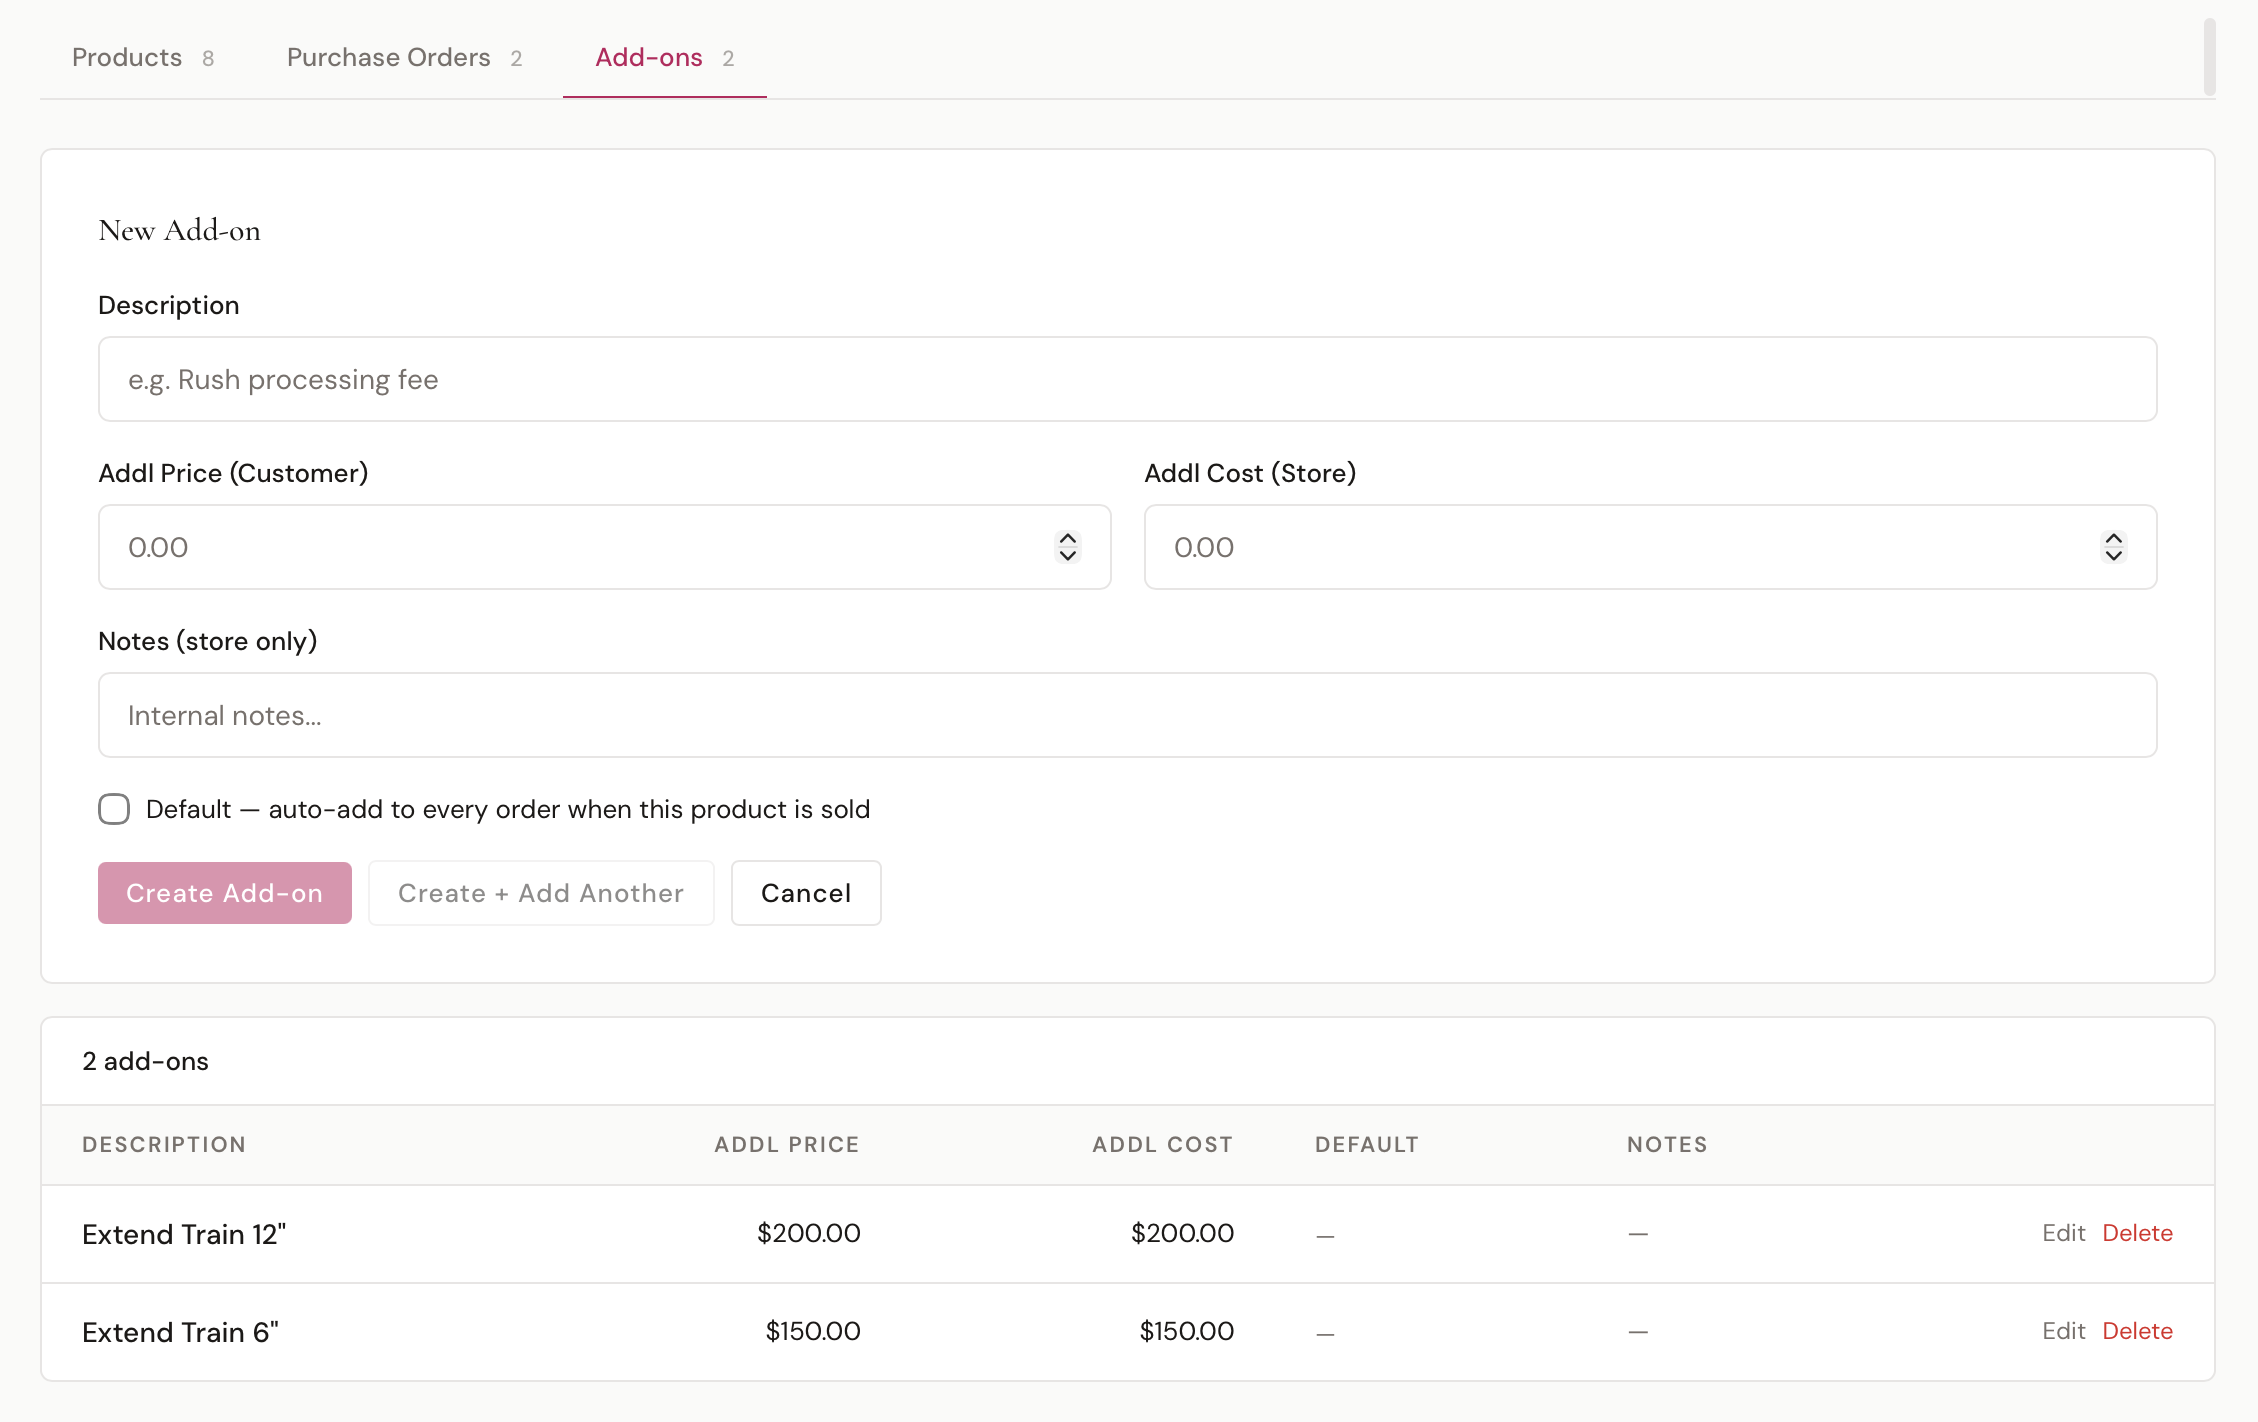
You have two save options:
- Create Add-on — saves and returns to the list
- Create + Add Another — saves and clears the form so you can immediately add the next one
Mark an add-on as Default to have it automatically added to the cart whenever one of this vendor's products is added at the POS.
Editing and Deleting
Click Edit on any add-on to switch to an inline edit form. Click Save Changes when done. Click Delete to permanently remove an add-on.
Copy Add-ons From Another Vendor
If a vendor shares an identical add-on list with one you've already set up — for example, a couture line and its sister label — you don't have to re-enter each add-on by hand. Click Copy from vendor… in the Add-ons tab header, pick the source vendor from the dropdown (each option shows how many add-ons that vendor has), and click Copy. Every add-on from that vendor is copied into this one in a single step.
A few things to know:
- Any add-on whose description already exists on this vendor is skipped, so it's safe to run more than once — you won't end up with duplicates.
- It copies the add-on definitions (description, prices, cost, notes, default flag), not their product assignments. The copied add-ons start unattached, so you assign them to products afterward like any other add-on.
- The button only appears when there's at least one other vendor to copy from.
Once created, vendor add-ons can be assigned to individual products from the Product detail page or in bulk from the Products list.
Color Groups
Color Groups are reusable named color palettes for a vendor — for example, a designer's seasonal color story ("Spring 2026 Naturals"). Once a group exists, it can be picked as the Color Group on any of the vendor's products via the Palette card, and the colors flow into the Variant Color autocomplete.
Click the Color Groups tab on a vendor's profile to manage them.
Creating a Color Group
| Field | Description |
|---|---|
| Name | The group's display name (e.g., "Core Ivories", "Spring 2026 Naturals") |
| Colors | Comma-separated list of color names (e.g., Ivory, Champagne, Blush, Mauve) |
Click Save to create the group. It immediately becomes selectable on the vendor's products.
Editing and Deleting
Each group has inline Edit and Delete buttons. Editing the colors reflects on every product currently using that group — the palette is read live, so updates propagate without re-saving each product.
Size Charts
Size Charts are reusable named size tables with measurements for each size — including optional per-size add-on cost and price. Once a chart exists, it can be picked as the Size Chart on any of the vendor's products via the Palette card, and the sizes flow into the Variant Size autocomplete.
Click the Size Charts tab on a vendor's profile to manage them.
Creating a Size Chart
| Field | Description |
|---|---|
| Name | The chart's display name (e.g., "Standard Bridal", "Plus Size 18-32") |
| Rows | One row per size, with measurement columns |
Each row has these columns:
| Column | Description |
|---|---|
| Size | The size label (e.g., 8, 12W, XL) |
| Bust | Bust measurement |
| Waist | Waist measurement |
| Hips | Hips measurement |
| Hollow to Hem | Length measurement from hollow of throat to hem |
| Additional Cost | Optional — extra wholesale cost for this size (e.g., plus-size upcharge from the vendor) |
| Additional Price | Optional — extra retail price for this size |
Click Add Row to append a new size and the trash icon on a row to remove it. Save writes the whole chart at once.
Vendor Pricing
The vendor edit page has a Pricing section where you set the default markup math used by every product from this vendor. Each rule has a value and a type — products inherit these defaults but can override any of them on their own Pricing Rules sub-section.
| Field | Type Options | Description |
|---|---|---|
| Retail Factor | Dollar / Percent / Multiplier | The primary markup applied to cost (e.g., a 2.4 multiplier doubles cost and adds 40%) |
| Retail Factor Plus | Dollar / Percent / Multiplier | A second markup applied after Retail Factor — useful for layering a fixed margin on top of a multiplier |
| Tariff | Dollar / Percent | A tariff or duty added on top. Percent is calculated against cost, not the running total. |
These defaults cascade down to every product unless that product overrides them. Update them in one place and every uncustomized product picks up the new math the next time someone runs Calculate from cost & pricing rules on the Selling Price field. BridalOp never recalculates existing prices automatically when vendor defaults change — pricing is always an explicit action.
Consignment Split Logic
The revenue split percentage can be set at three levels. BridalOp uses the most specific one:
- Per product — if a product has its own split %, that takes priority
- Per vendor — if the vendor has a custom split %, it's used as the fallback
- Global default — the default set in Settings > General > Consignment (used when neither product nor vendor has a custom split)
Where Vendors Appear
Vendors are referenced throughout BridalOp:
Products
When creating or editing a product, you select a vendor (for wholesale/purchased products) or a consignment vendor (for consignment items). The vendor name appears on the product detail page.
Purchase Orders
Every purchase order is tied to a vendor. When creating a PO, you select the vendor and add the items you're ordering from them.
Inventory
Inventory items inherit their vendor relationship from their product. This lets you filter and track inventory by vendor.
Consignment Settlements
When you create a consignment settlement (Consignment in the sidebar), you select a consignment vendor and a date range. BridalOp automatically finds all sold consignment items from that vendor during that period and calculates the split.
Reports
The Consignment report shows sales, vendor payouts, and store revenue aggregated by consignment vendor. The Inventory Summary report shows ownership type (store-owned vs. consignment) per product.
Global Search
Vendors are searchable from the Global Search — type a vendor name to jump directly to their profile.